Create a Password Hide and Show Feature Using HTML, CSS, and JavaScript
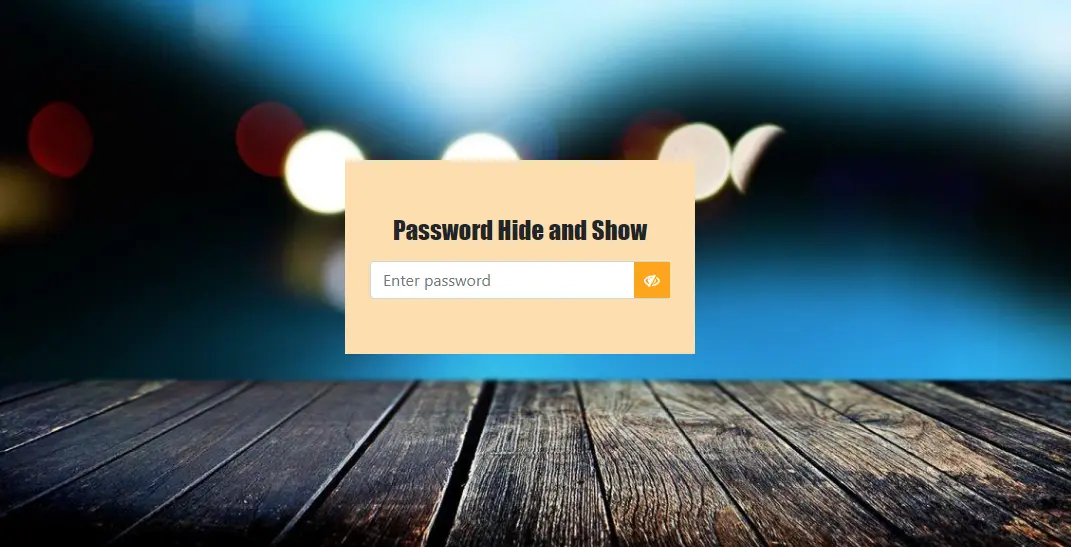
Websites and apps often include a feature that lets users show or hide their password as they type it in. This adds ease of use helping people check they’ve put in the right password, while also making them feel secure. We’re going to walk you through how to add this hide and show password in javascript, HTML and CSS. Once we’re done, you’ll be able to create a password field toggle that looks good and works well on any size screen for any web form.
HTML: Structuring the Form
Let’s begin by making a simple HTML form. This form will have a place to type in a password. We also need to add some icons or buttons. These will let users switch between seeing and hiding their password.
Here’s the basic structure:
					<div class="container">
    <div class="row justify-content-center">
        <div class="col-lg-4">
            <div style="background-color: navajowhite; padding: 15px; padding-top: 55px;">
                <h1 class="mb-3 text-center">Password Hide and Show</h1>
                <div class="input-container">
                    <input type="password" id="password" class="form-control" placeholder="Enter password">
                    <i class="fa fa-eye" onclick="togglePassword()" id="showEye"></i>
                    <i class="fa fa-eye-slash" onclick="togglePassword()" id="hideEye"></i>
                </div>
            </div>
        </div>
    </div>
</div>
In this code snippet, we have a password input field where the user will type their password. The icons (fa-eye and fa-eye-slash) are used to toggle between showing and hiding the password. The fa-eye will appear when the password is hidden, and fa-eye-slash will appear when the password is visible.
CSS: Adding Styles to the Form
Since we have a basic structure we now just need to add some CSS to style the password input field and icons. The CSS will also provide visually attractive elements.
					.fa-eye, .fa-eye-slash {
    position: absolute;
    top: 50%;
    right: 0px;
    transform: translateY(-50%);
    cursor: pointer;
    padding: 10px;
    color: white;
}

.fa-eye {
    background-color: red;
    display: none;
}

.fa-eye-slash {
    background-color: orange;
    display: inline-block;
}

h1 {
    font-size: 25px;
    font-family: fantasy;
}

.container {
    margin-top: 15%;
}

.input-container {
    position: relative;
    width: 100%;
}

input[type="password"], input[type="text"] {
    width: 100%;
    padding-right: 45px;
}
In the CSS, we’ve defined styling for the page’s body, icons, headings, and the password input field. The .fa-eye and .fa-eye-slash classes control the visibility of the eye icons. Initially, .fa-eye-slash is displayed and .fa-eye is hidden. When toggling the password visibility, we’ll switch the display properties of these two classes.
JavaScript: Implementing the Toggle Functionality
Finally, we need the JavaScript function that will handle the actual toggling of the password visibility. This script will dynamically change the input type between password and text, and it will switch between the two icons based on the current state.
					var password = document.getElementById("password");
var showEye = document.getElementById("showEye");
var hideEye = document.getElementById("hideEye");

function togglePassword() {
    if (password.type === "password") {
        password.type = "text";
        showEye.style.display = "inline-block";
        hideEye.style.display = "none";
    } else {
        password.type = "password";
        showEye.style.display = "none";
        hideEye.style.display = "inline-block";
    }
}
Here’s how the JavaScript works:
- The function
togglePassword()checks the current type of the input field (passwordortext). - If it’s set to
password, it switches the type totextto make the password visible, and shows the “eye” icon while hiding the “eye-slash” icon. - If the field is in
textmode, it reverses the process to hide the password again.
This simple password hide and show functionality can significantly improve the user experience on your website. It not only ensures that users can easily verify their passwords but also gives them control over their data privacy. You can further enhance this by adding form validation, animations, or incorporating the toggle into multi-step forms.
